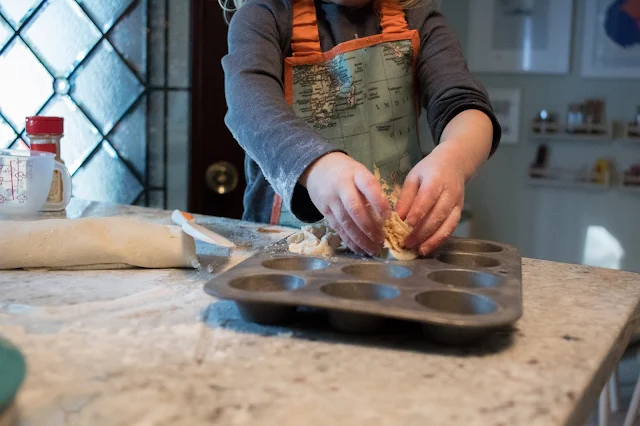
My kids love to work in the kitchen! They especially love to work in the kitchen when they are making sweet treats for themselves and for the whole family. One thing that they make over and over again is cinnamon rolls! I have been asked to share this recipe time and time again, because it is so perfect for children to make independently.
See Nora in action making these rolls here. And here!
See Nora in action making these rolls here. And here!
Now, if you are looking for a gluten free, sugar-free, healthy treat, this is not your recipe. They are still delicious but a sometimes treat for our family. These easy cinnamon rolls are something that my family has been making since I was a little child. It was one of my favorite desserts as a kid, and now that tradition has been passed to my children. That means, that some of these instructions are more guidelines than hard and fast rules, so feel free to adjust to fit the needs of your family.
This post contains affiliate links at no cost to you.
Ingredients - You'll Need
Warm water
Flour
Butter (we actually use Earth Balance since we are dairy-ish free)
Sugar
Cinnamon
To Make
First, have your child wash his or her hands! Typically, I would assume adults know this, but for kids it's an important first step in the process and one they need to know how to do before starting to bake independently.
Then, add an apron, if you have one. Nora is wearing this fantastic map apron. I love having an apron for her because cooking/baking is not a clean process all the time! This helps just keep clothes as clean as possible so we don't need to clean the whole kitchen and do laundry at the same time!
Next, measure out some Bisquick. This is really not an exact process, we use a lot of it if we want more cinnamon rolls, and less if we want fewer. I would say for the kids, maybe a cup and a half-ish! Its really not an exact measurement, which is good for a 2/3 year old that is just starting to measure accurately. It won't mess up the recipe if they is changed.
After adding the Bisquick to a bowl, add some warm water and start to stir. You want it to be a thick dough, but not sticky. And sorry, I cant really be of much help here, it's a feel thing. If you add too much water, add some flour to thicken it up. We've done pretty much all combinations of Bisquick/water/flour ratios and they turn out each time. So, really don't worry too much about it -- again, that's why I love this recipe for young kids.
Once you have the dough in a bowl, flour a counter-top or table and begin to roll the dough. Nora is using this mini-rolling pin. The dough should be evenly rolled to about 1/4" thick, but if it's not perfect, that's ok too!
After rolling the dough, soften the butter in your hands. This is one of Nora's favorite parts. Then, rub the butter all over the dough until the entire thing is covered. At this point, we wash our hands again, before starting to sprinkle sugar and cinnamon over the dough. How much sugar and cinnamon you choose to put on is up to you. We try not to go too overboard but if the kids are making by themselves, then the exact amount varies.
Once the dough is covered with butter, cinnamon, and sugar, you can start to roll it into a log. This has probably been the trickiest part for my kids to learn, and at 3.5-years-old, I still help Nora some with getting the rolling started. When the dough is all rolled, we use a nylon knife to cut (or a butter knife just not something sharp that will scratch your counter/work surface.) Finally, we place into a greased cupcake pan. Using a mini-pan is great because then Nora can cook the rolls independently with the toaster oven, instead of relying on me to open and close our large oven.
Hopefully, this is helpful! You can see that this recipe is really flexible for children and a perfect way to allow them to independently work in the kitchen while really contributing to the family!
What do your children like to make in the kitchen?
---


